Manage folders
Video: Configuring Folders
We recommend you use folders to keep your portals structured. The quick and easy way to do this is to set up a default folder structure. This folder structure is then automatically applied to each portal. This ensures all portals have a consistent folder structure, which will help you manage the documents.
You can edit the default folder structure that is applied to a specific portal, if required. For example you may want to add another folder or delete one that is not in use. Similarly, if you do not use a default folder structure, you can add folders to individual portals as required.
You should plan your required folder structure and set it up before you add any documents.
The folder structure you set up is visible to the portal subscribers. Subscribers can also add and delete folders.
Settings - Client Portal
- Click Settings > Client Portal > Portal Settings.
- Click Manage Default Folder Structure.

- Click Create Folder.
- Type a folder name, for example the year.
- Click Save.
- Create a subfolder, if required.
- Click the new folder to open it.
- Click Create Folder.
- Type a folder name, for example Financial reports.
- Click Save.
- Repeat the above steps to create more folders and subfolders as required.
- Click the Edit button
 on the row of a folder to change the folder name, if required.
 - Click the Delete button
 on the row of a folder to delete it, if required.
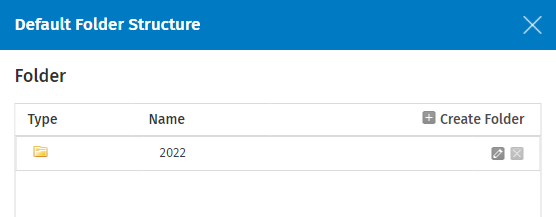
If you delete a folder from the default folder structure settings area, it is no longer visible in this area. The deleted folder will remain in existing portals, but will not be present in any new portals. See the example below.
- Click Close.
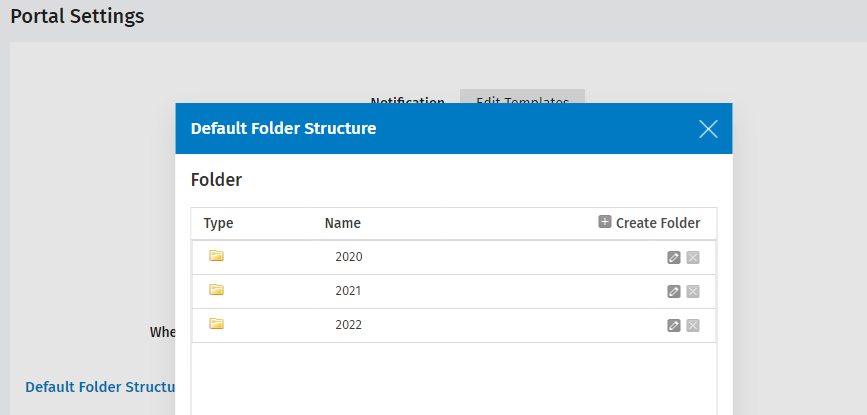
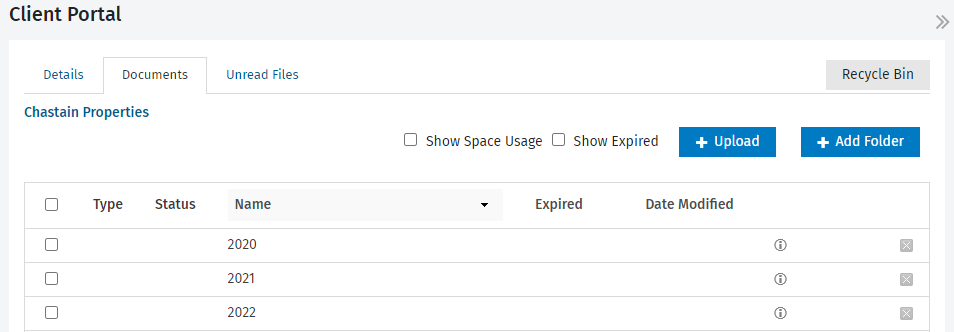
Example of a default folder structure applied to a portal
Example of how changes to the default structure affects portals
Suppose the name of the 2020 folder is changed to Reports, and the 2021 folder is deleted. The default structure now looks like this:
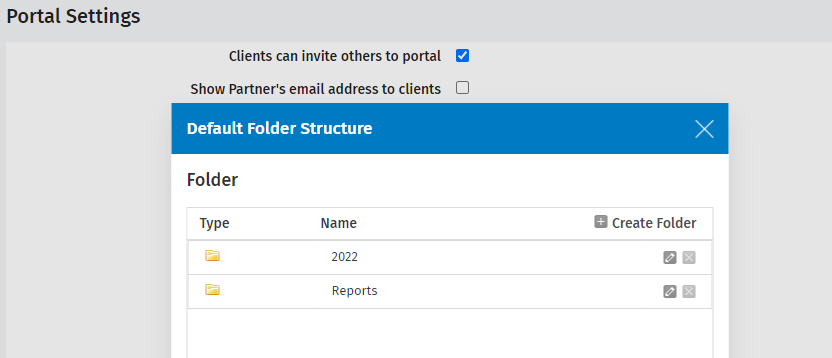
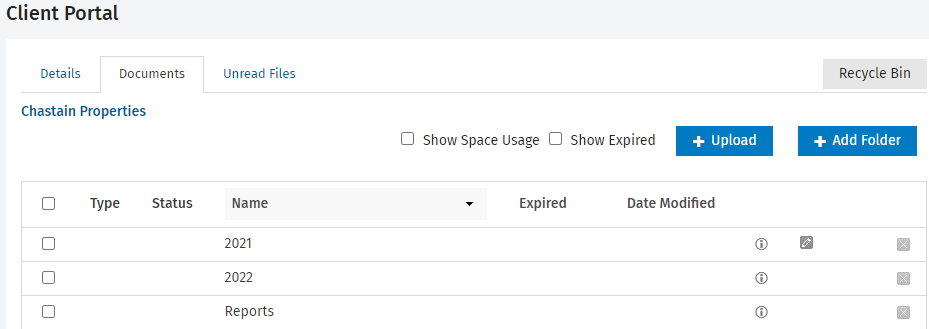
Within all existing portals, the name change leads to the creation of a new folder called Reports, while the 2020 folder remains present. The 'deleted' 2021 folder also remains present.
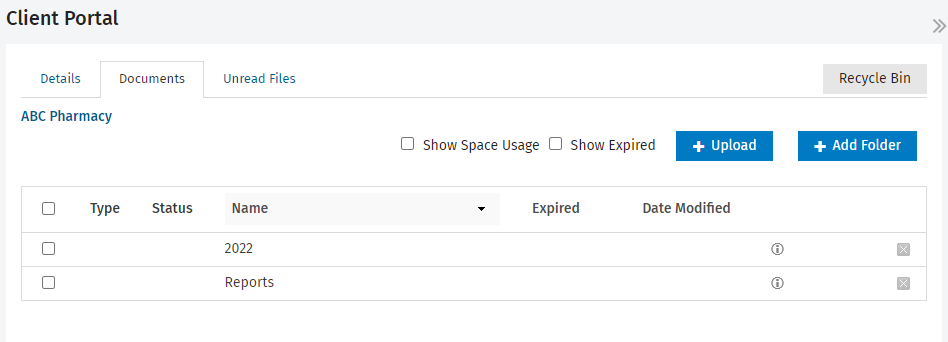
However, when a new portal is created from this point forward, it will have the new default folder structure:
Contacts - View, Add and Edit Contacts; Client Portal - View
- Click Client Portal.
- Click the required portal.
- Click the Documents tab.
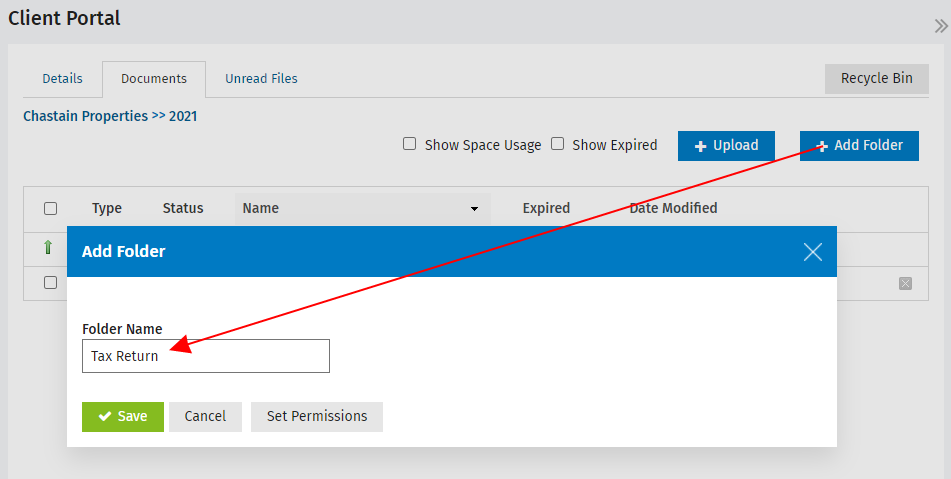
- Click Add Folder.
- Type the folder name.
- Click Save.
- Repeat the above steps to add more folders.
- Click on a folder to open it and add subfolders in the same way.
.png)
Contacts - View, Add and Edit Contacts; Client Portal - View
- Click Client Portal.
- Click the required portal.
- Click the Documents tab.
- Click the Rename button
 on the row of the folder whose name you want to change.
 - Highlight the existing text and type the new folder name and press Enter.
Rename folder in Default Folder Structure
- Click Settings > Client Portal.
- Click Portal Settings.
- Click Manage Default Folder Structure.
- Click the Rename Folder button
 on the row of the folder whose name you want to change.
 - Highlight the existing text and type the new folder name and click Save.
Contacts - View, Add and Edit Contacts; Client Portal - View
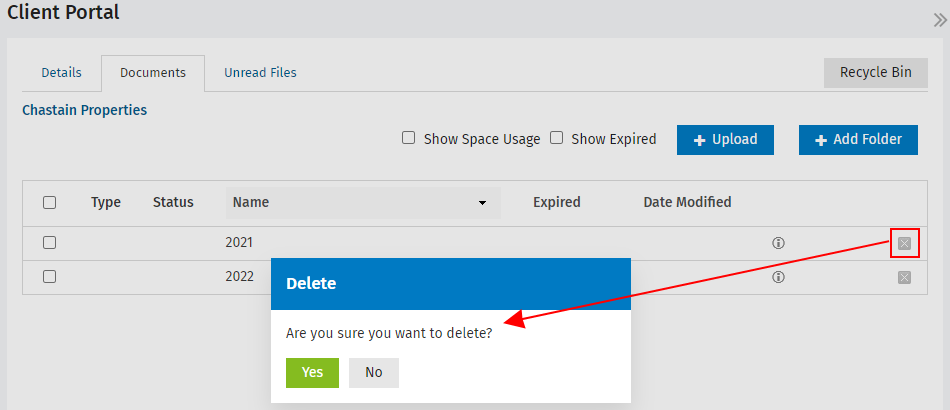
When you delete a folder, the folder and its contents move to the Recycle Bin.
- Click Client Portal.
- Click the required portal.
- Click the Documents tab.
- To delete an individual file: click the Delete button
 at the end of its row, then click Yes to confirm.
 - To delete files in bulk: select their check boxes and click the Delete button, then click Yes to confirm.
